Smart home technology has revolutionized the way we live, allowing us to control our homes with just a touch of a button. Apple's HomeKit and Home Assistant are two of the most popular smart home platforms, each offering its own unique features and benefits.
By integrating and using HomeKit with Home Assistant, you can create a comprehensive and convenient smart home setup that takes your smart home experience to the next level. In this article, we'll explore the topic of how you can use HomeKit with Home Assistant, and provide an in-depth look at what this integration can offer to smart home enthusiasts.
Is Home Assistant compatible with HomeKit?
Home Assistant is fully compatible with HomeKit. By integrating HomeKit with Home Assistant, you can automate routine tasks, control multiple devices with a single command, and interact with your devices using your voice, making your smart home more seamless and efficient than ever before.
Integrating HomeKit with Home Assistant lets you enjoy the best of both worlds: the advanced smart home features of HomeKit and the centralized control of Home Assistant. This integration can help simplify the smart home setup process and make it easier for users to control their devices.
Additionally, the integration can lead to a more seamless and efficient smart home experience, with features such as automated routines and voice control working together to provide a more convenient and personalized smart home experience.
Whether you're a tech-savvy early adopter or just looking to upgrade your home, this integration is relevant and useful for anyone interested in smart home technology.
HomeKit vs Home Assistant
HomeKit and Home Assistant are both smart home platforms, but they serve different purposes.
HomeKit is a platform created by Apple that allows users to control their smart home devices using an iOS device or Siri. Home Assistant, on the other hand, is an open-source home automation platform that offers more customization and control over your devices.
While both platforms can be used together to enhance the smart home experience, Home Assistant provides a more versatile and flexible platform for advanced users, while HomeKit offers an easy-to-use interface for controlling devices via iOS and Siri.
Check out my Home Assistant vs HomeKit article for a more in-depth comparison of these platforms.
Setting up HomeKit
Requirements for using HomeKit
To use HomeKit, you will need an iOS device (such as an iPhone or iPad) running iOS 10.3 or later. Additionally, if you want to control your HomeKit devices while away from home, you will need an Apple TV (3rd generation or later) or an iPad that's set up as a home hub. With a home hub, you can control your HomeKit devices from anywhere with an internet connection, even when you're away from home.
It's also worth noting that to use HomeKit, you'll need to have compatible smart home devices. These devices can include lights, locks, thermostats, and more. You'll need to ensure that these devices are certified as "Works with Apple HomeKit" before you can use them with HomeKit.
Steps for setting up HomeKit on an iOS device
Here are the steps for setting up HomeKit on an iOS device:
Make sure your iOS device is running iOS 10.3 or later.
Connect your smart home devices to your home's Wi-Fi network.
Open the Home app on your iOS device.
Tap the "+" icon in the top right corner of the screen.
Tap "Add Accessory" and follow the on-screen instructions to add each of your smart home devices to the Home app.
To group your devices into rooms, tap and hold on a device, then tap "Edit Accessory".
From the Edit Accessory screen, select the room you want to add the device to, or create a new room by tapping "Add Room".
Repeat this process for each of your smart home devices.
If you want to control your devices remotely, set up an Apple TV or iPad as a home hub.
With your home hub set up, you can control your HomeKit devices from anywhere with an internet connection.
By following these steps, you can set up HomeKit on your iOS device and start using your smart home devices with the Home app. With HomeKit, you can control your devices, create automations and scenes, and access advanced features such as Siri integration.
HomeKit tips and troubleshooting advice
Here are some tips and troubleshooting advice for any potential issues when using HomeKit:
Make sure your devices are certified "Works with Apple HomeKit" - Only devices that have been certified as "Works with Apple HomeKit" will work with HomeKit. Before purchasing a new device, make sure it has been certified for use with HomeKit.
Check that your devices are connected to the same Wi-Fi network - HomeKit devices must be connected to the same Wi-Fi network as your iOS device to work properly. If you're having trouble connecting a device, check that it is connected to the same network as your iOS device.
Update your iOS device to the latest version - HomeKit requires iOS 10.3 or later. Make sure your iOS device is running the latest version of iOS to ensure compatibility with HomeKit.
Restart your devices - If you're having trouble connecting a device to HomeKit, try restarting both the device and your iOS device.
Disable and re-enable the Home app - If you're having trouble controlling a device, try disabling and re-enabling the Home app on your iOS device.
Check the Home app's settings - The Home app has several settings that can affect how it interacts with your devices. If you're having trouble, check the app's settings to make sure everything is configured correctly.
Contact the device manufacturer for additional support - If you're still having trouble, contact the manufacturer of the device for additional support.
By following these tips and troubleshooting advice, you can help ensure a smooth and problem-free experience when using HomeKit. If you're still having trouble, don't hesitate to reach out to the manufacturer of the device for additional support.
Integrating HomeKit with Home Assistant
How Does Home Assistant Work with HomeKit
Home Assistant is an open-source home automation platform that allows you to control and automate smart devices in your home. It provides a centralized way to manage and control smart devices and supports a wide range of devices and platforms, including HomeKit.
When used in conjunction with HomeKit, Home Assistant can provide additional functionality and flexibility compared to using HomeKit alone. For example, Home Assistant can allow you to:
Integrate devices from multiple platforms - With Home Assistant, you can integrate devices from multiple platforms, including HomeKit, and control them all from a single interface.
Create complex automations - Home Assistant provides a powerful automation engine that allows you to create complex automations, such as turning off all lights in your home when you leave for the day.
Access advanced features - Home Assistant provides advanced features, such as custom sensors and switches, that may not be available through HomeKit alone.
Monitor your home from anywhere - Home Assistant allows you to monitor and control your home from anywhere with an internet connection, giving you peace of mind when you're away from home.
By using HomeKit in conjunction with Home Assistant, you can take advantage of the benefits of both platforms and create a smart home that meets your specific needs. Whether you want to integrate devices from multiple platforms, create complex automations, or monitor your home from anywhere, Home Assistant and HomeKit can help you achieve your goals.
How to add HomeKit devices to Home Assistant
Here are the steps for integrating HomeKit with Home Assistant:
Set up HomeKit on your iOS device - Before you can integrate HomeKit with Home Assistant, you'll need to set up HomeKit on your iOS device. This typically involves downloading the Home app and setting up your HomeKit devices.
Install the Home Assistant software on a device - Home Assistant can run on a variety of devices, including a Raspberry Pi, a computer, or a NAS device. You'll need to install the Home Assistant software on one of these devices to use it.
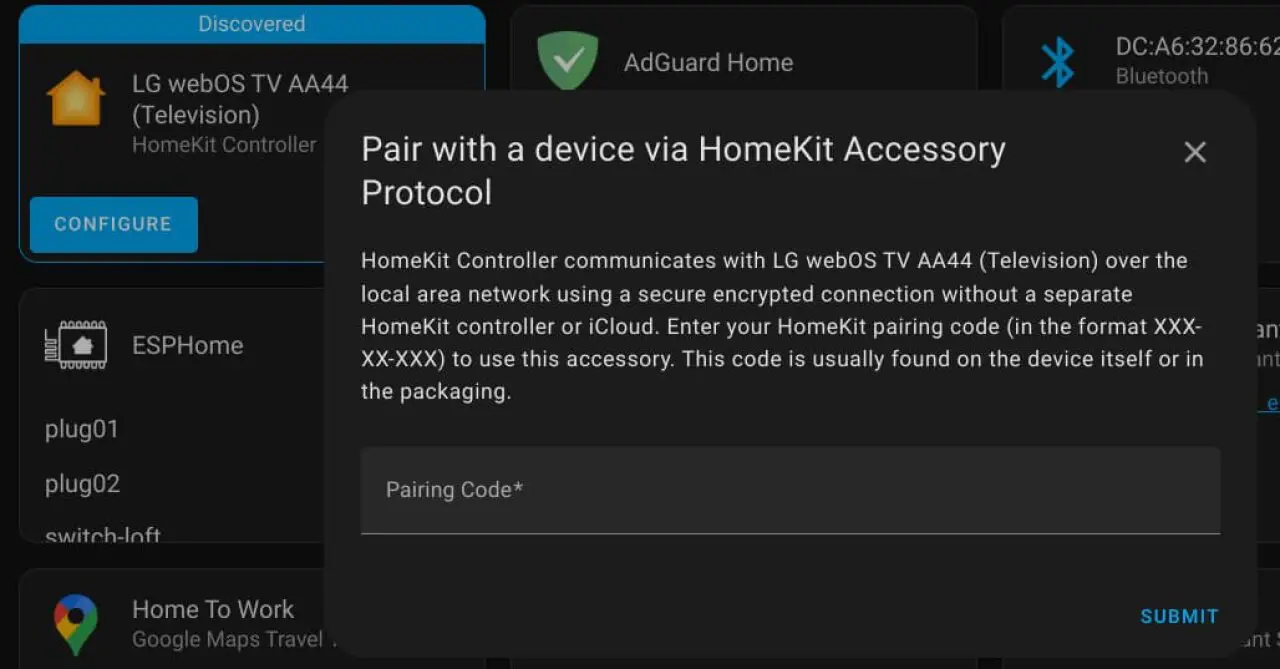
Install the Home Assistant HomeKit Controller integration - The Home Assistant HomeKit Controller integration provides integration with HomeKit. You can install the integration through the Home Assistant UI by navigating to the "Devices & Services" page and searching for "HomeKit Controller". In most cases, Home Assistant will automatically detect HomeKit devices that are connected to your network and notify you on the integrations page.
Add your HomeKit devices to Home Assistant - After you've configured the HomeKit component, you can add your HomeKit devices to Home Assistant. You can do this by navigating to the "Devices" page in the Home Assistant UI and clicking the "Add Device" button.
Create automations and scenes - With your HomeKit devices added to Home Assistant, you can start creating automations and scenes. Automations allow you to trigger actions based on certain conditions, while scenes allow you to set multiple devices to a desired state with a single command.
By following these steps, you can integrate HomeKit with Home Assistant and take advantage of the benefits of both platforms. Keep in mind that the specific steps and configurations may vary depending on your specific setup, so be sure to consult the Home Assistant documentation for more information.
Examples of how HomeKit and Home Assistant can be used together
Here are a few examples of how you can use HomeKit and Home Assistant together to control smart home devices:
Automated lighting - With Home Assistant and HomeKit, you can set up automations that control your lighting based on specific conditions. For example, you can have your lights turn on automatically when you enter the room or turn off when you leave.
Climate control - You can use HomeKit and Home Assistant to control your thermostat and other climate control devices. For example, you can set up an automation to adjust the temperature in your home based on the time of day or your location.
Security - You can use HomeKit and Home Assistant to monitor and control security devices, such as door locks and cameras. For example, you can set up an automation to lock your doors when you leave the house or receive a notification when someone enters your home.
Entertainment - You can use HomeKit and Home Assistant to control entertainment devices, such as TVs, sound systems, and game consoles. For example, you can set up a scene that turns on your TV, sound system, and adjusts the lighting for movie night.
These are just a few examples of how you can use HomeKit and Home Assistant together to control smart home devices.
With the powerful automation capabilities of Home Assistant and the seamless integration of HomeKit, you can create a smart home that meets your specific needs and provides a convenient, integrated experience.
How to remove HomeKit integration from Home Assistant
Removing the HomeKit integration from Home Assistant is easy, simply follow these steps to get the job done:
Open Home Assistant and go to the "Settings" page followed by "Devices & Services".
On the "Devices & Services" page locate the HomeKit integration. If you are struggling to locate it look for devices with a sub-heading of "HomeKit Controller".
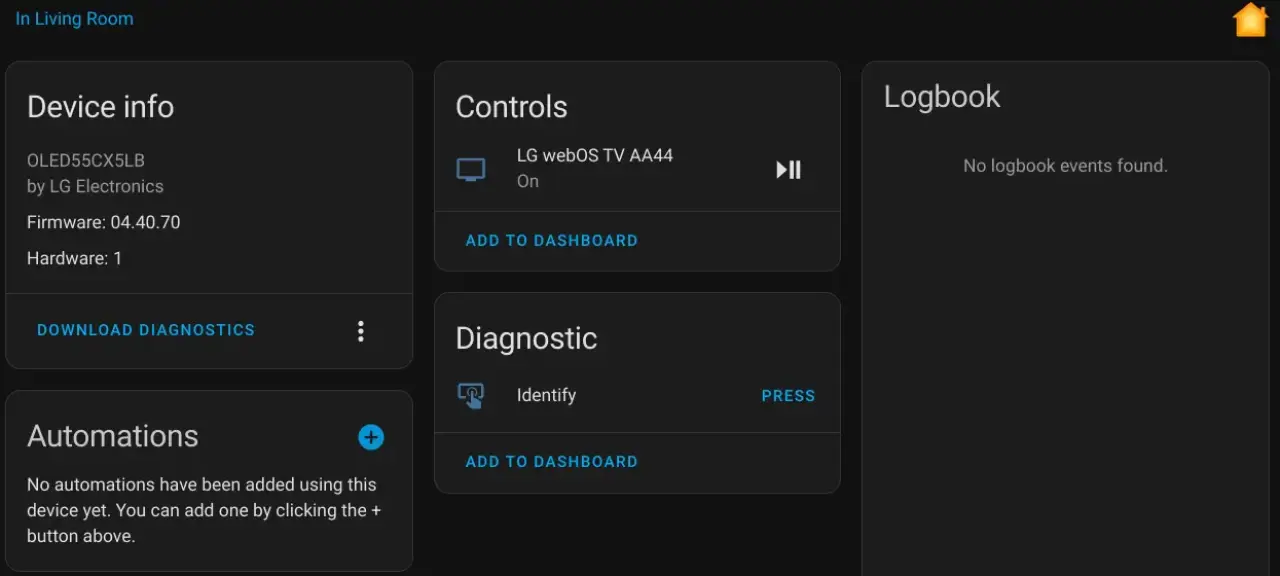
Click the three dots icon from the bottom right corner of the device and choose "Delete". The HomeKit controller device will now be deleted from Home Assistant. If Home Assistant automatically discovers it again you can choose the ignore option on the notification to prevent it from notifying you again.
Home Assistant and HomeKit Advanced Features
HomeKit and Home Assistant offer several advanced features that allow you to customize your smart home experience. Here's a look at some of these features:
Automations - Automations are a key feature of Home Assistant that allows you to automate actions based on certain conditions. With HomeKit and Home Assistant, you can create automations that control your smart home devices based on factors such as time of day, location, or device state. For example, you can set up an automation that turns off your lights when you leave the house or turns on the heating when you arrive home.
Scenes - Scenes allow you to set multiple devices to a desired state with a single command. For example, you can create a "Movie Night" scene that turns off the lights, lowers the blinds, and turns on your TV and sound system. With HomeKit and Home Assistant, you can create scenes that control your HomeKit devices as well as other smart home devices.
Siri integration - HomeKit allows you to control your smart home devices using Siri. With HomeKit and Home Assistant, you can use Siri to control your devices, trigger scenes, and even ask for device status information. For example, you can say "Hey Siri, turn off the lights" or "Hey Siri, what's the temperature in my living room?"
These are just a few examples of the advanced features available when using HomeKit with Home Assistant. The powerful automation capabilities of Home Assistant combined with the ease of use of HomeKit make it possible to create a truly customized and integrated smart home experience.
Whether you're looking to automate simple tasks or create complex scenes, HomeKit and Home Assistant provide the tools you need to get the most out of your smart home devices.
By using these advanced features of HomeKit and Home Assistant, you can create a more seamless and efficient smart home experience that is customized to meet your specific needs. Whether you're looking to automate simple tasks or create complex scenes, HomeKit and Home Assistant provide the tools you need to get the most out of your smart home devices.
Additional Resources
For readers who want to learn more about using HomeKit with Home Assistant, there are many additional resources available online. Some of the best resources include:
Home Assistant HomeKit Controller documentation - The official Home Assistant website provides a wealth of information on using HomeKit with Home Assistant, including tutorials, forums, and documentation.
HomeKit community forums - There are several online communities dedicated to HomeKit and Home Assistant, where you can find answers to your questions, share tips and advice, and connect with other users.
YouTube tutorials - There are many great YouTube tutorials available that provide step-by-step instructions on setting up HomeKit and Home Assistant, as well as tips and tricks for getting the most out of your devices.
Apple's HomeKit website - Apple's official HomeKit website provides information on the features and capabilities of HomeKit, as well as how to use it with your devices.
Home Assistant vs HomeKit - This is an article I wrote comparing the differences to help you find which one would better suit your home.
By exploring these resources, you can gain a deeper understanding of how to use HomeKit with Home Assistant and make the most of your smart home devices.
Conclusion
If you're looking to get the most out of your smart home devices, I highly recommend you use HomeKit with Home Assistant. The combination of HomeKit's advanced automation and control capabilities with Home Assistant's versatility and customization options offers a powerful and convenient way to manage your smart home devices.
With HomeKit, you can automate routine tasks, control multiple devices with a single command, and interact with your devices using your voice, making your smart home more seamless and efficient than ever before.
So why wait? Give HomeKit with Home Assistant a try and see for yourself how easy and convenient it can be to manage your smart home.


