


ne of the key features of Home Assistant is its ability to send email notifications to alert you of events, such as when a door is opened or closed, or when a motion sensor is triggered.
[ez-toc]
Setting up email notifications in Home Assistant can be tricky if you're not familiar with the platform. In this guide, we will walk you through the steps to send emails from Home Assistant. If you are looking to send text messages from Home Assistant instead, check out this article.
The best way to send email from Home Assistant is to configure and use the built-in SMTP integration. This integration will use your email provider's SMTP server to send email notifications from Home Assistant to whoever you want.
Part 1: Setting Up Email Notifications For Home Assistant
Getting Your Email Provider's SMTP Details
Home Assistant can use the SMTP integration to send emails, this is the integration we will use throughout the first part of this guide.
The first step to getting email from Home Assistant working is to find out what your email provider's SMTP server name and port are.
Some common SMTP addresses are:
SMTP Provider | SMTP Hostname | SMTP Port |
|---|---|---|
smtp.gmail.com | 25, 465, or 587 | |
smtp-mail.outlook.com | 587 | |
smtp.mail.yahoo.com | 465 or 587 | |
smtp.mail.att.net | 465 or 587 | |
smtp.comcast.net | 465 or 587 | |
smtp.mail.me.com | 587 | |
smtp.aol.com | 465 |
Common SMTP addresses used
Note: If you have multi-factor authentication enabled on your email account (which you should do!) then you will need to create an app password specifically for Home Assistant. When using an app password you will not need to use an authenticator app to sign in. How to create an app password is out of the scope of this article but if you use Gmail then this guide from Google will help you.
Home Assistant SMTP Example
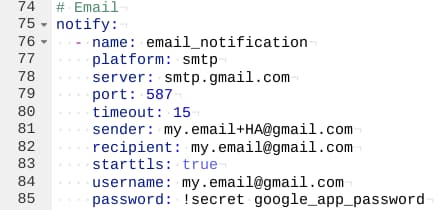
The setup of SMTP email in Home Assistant is to manually add the required configuration to your config file. The example below shows my own configuration (real email address removed for demonstration).
Use Home Assistant To Send Gmail
In this section we are going to use Gmail as our email provider to set up the email notification service in Home Assistant and send a test email, follow these steps:
Open the configuration.yaml file: The configuration.yaml file contains all the settings for Home Assistant, including email notifications.
Configure the SMTP server settings: In the configuration.yaml file, find the "notify" section, and add the following lines:
notify:
  - name: email_notification
    platform: smtp
    server: smtp.gmail.com
    port: 587
    timeout: 15
    sender: YOUR_EMAIL_ADDRESS
    sender_name: "YOUR NAME" #optional
    recipient: YOUR_EMAIL_ADDRESS
    starttls: true
    username: YOUR_EMAIL_ADDRESS
    password: YOUR_EMAIL_PASSWORD
Replace YOUR_EMAIL_ADDRESS with your email address and YOUR_EMAIL_PASSWORD with your email password. Also, update the server name and port number if you are using a different email service.
Restart Home Assistant so that it can load your new configuration.
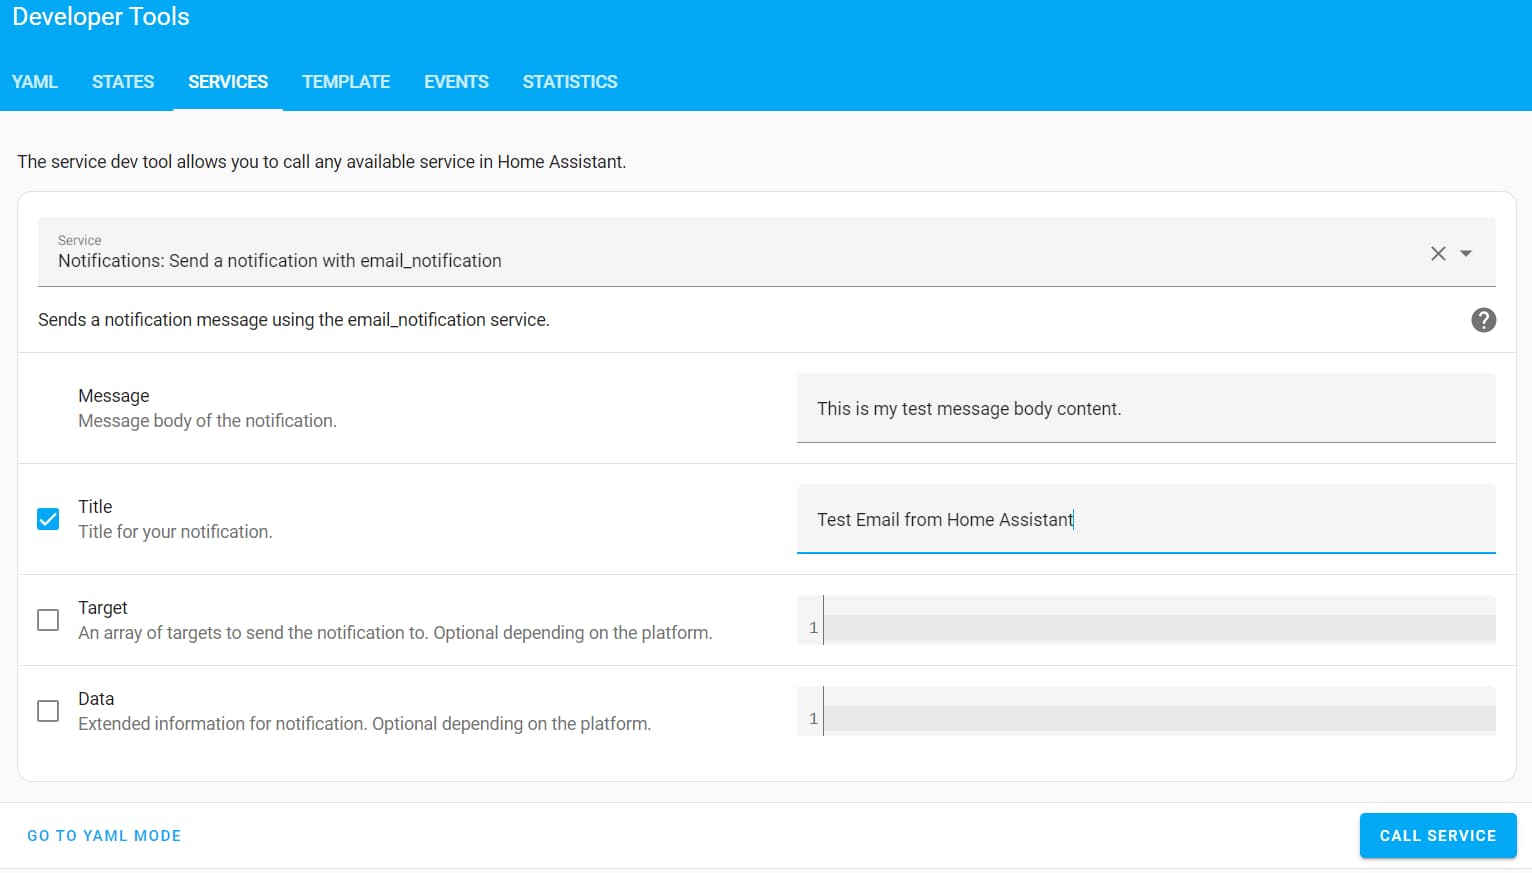
Test the email notification service: To test the email notification service, go to the Home Assistant dashboard and click on "Developer Tools" in the sidebar. Then, click on "Services" and select "notify.email_notification" from the drop-down list. In the Message and Title boxes, enter some text to be sent in the email message.
Click on "Call Service" and you should receive an email in your inbox with the message and title you specified.
That's it! You have successfully set up the email notification service in Home Assistant. You can now create automations to send emails based on certain triggers or events.
Part 2: Creating and sending emails
Creating a Home Assistant automation to send email
To create and send emails in Home Assistant using the automation feature, follow these steps:
Create a new automation: In the Home Assistant dashboard, go to "Settings" and select "Automations". Then, click on the "+ Create Automation" button to create a new empty automation.
Set the trigger: Choose the trigger that will cause the email to be sent. For example, you can choose to send an email when a motion sensor is triggered or when the temperature in a room exceeds a certain threshold.
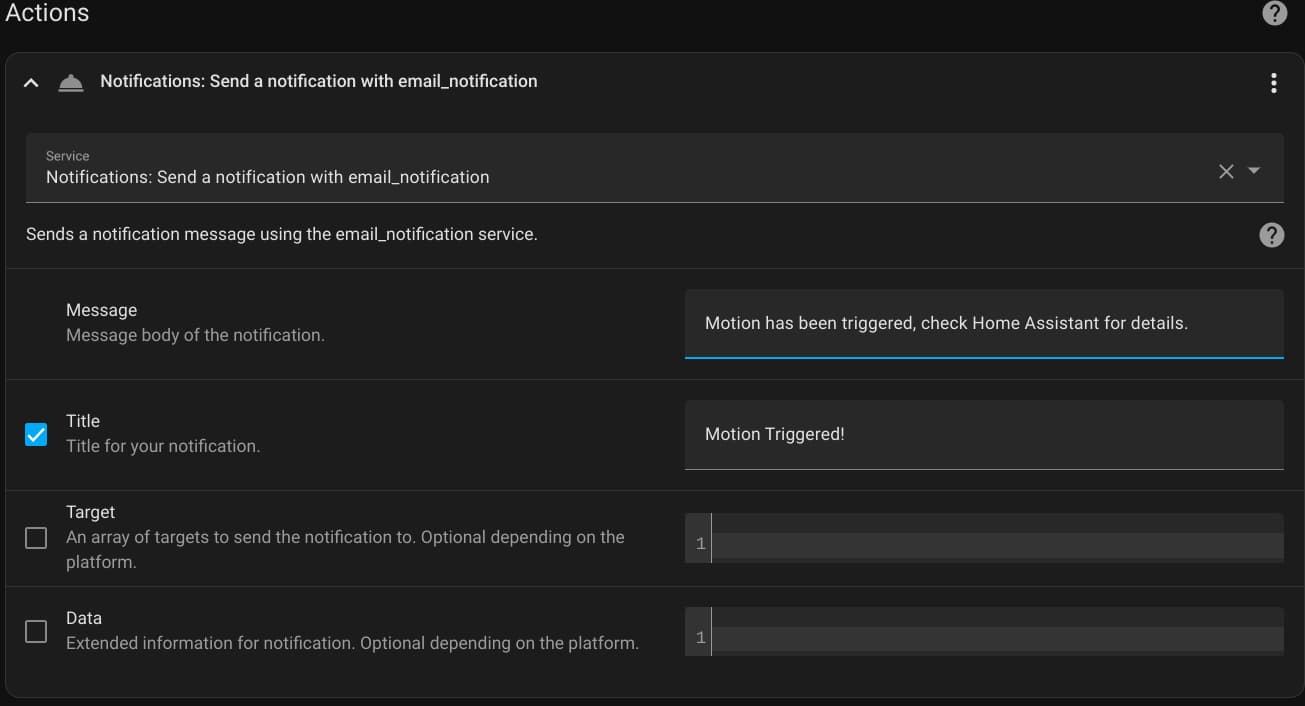
Add the email action: To add the email action, click on the "+ Add Action" button in the actions section. Then, select "Call Service" and search for notify.email_notification from the service drop-down list. In the message and title boxes, enter the custom message and title you would like to show in the emails.
Save the automation: Once you have set up the trigger and the email action, click on "Save" to create the automation.
That's it! Your automation is now set up to send emails based on the trigger you selected. You can customize the email message further by adding variables such as the current date or the temperature in a room. This can be done by using Home Assistant's templating feature.
Home Assistant Send Email With Attachment
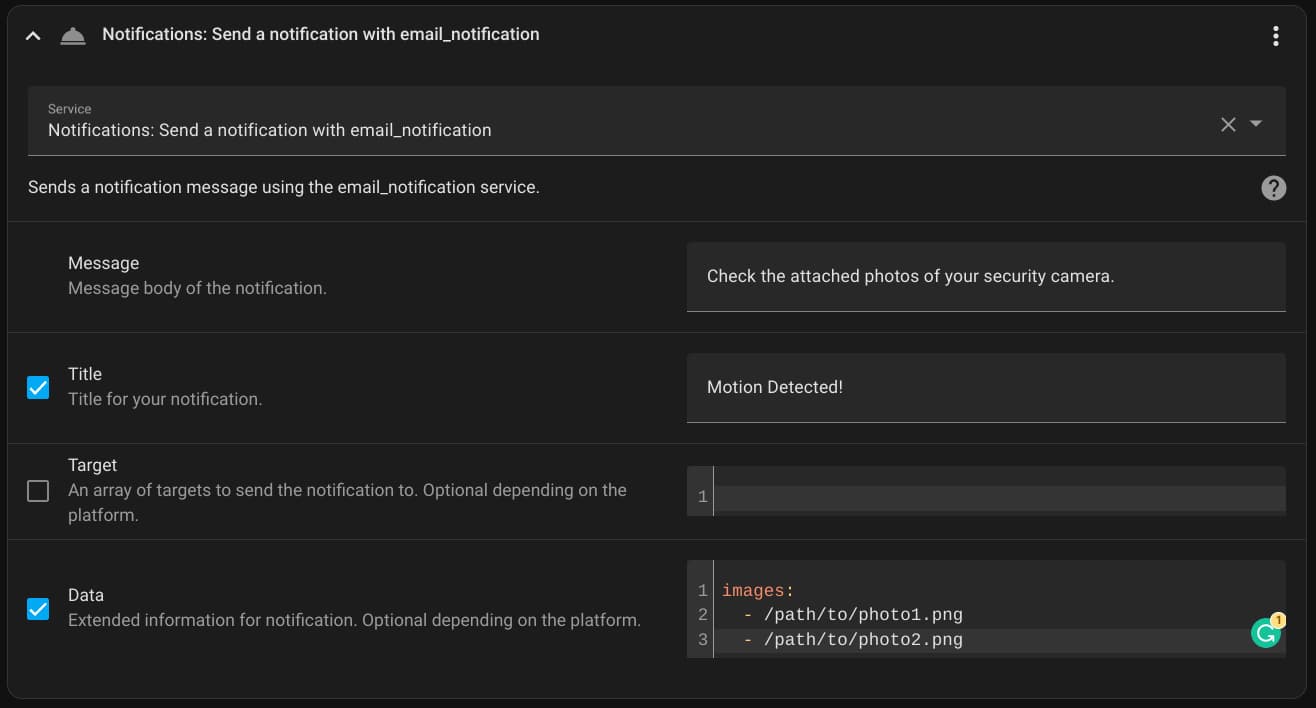
The Home Assistant SMTP integration can also send emails with attachments such as photos or camera footage. To do this you will need to use the data field in your automation.
To attach photos simply tick the "Data" field then start with images: on the first line then add a new line for each image including the full path as illustrated below.
Home Assistant Email Trigger
There may be occasions when you would like to use an email as a trigger for one of your Home Assistant automations. It might be something simple like when your email inbox reaches a certain number of unread emails or you receive an email from a specific sender.
To set up an email trigger in Home Assistant we need to use the IMAP or IMAP Email Content integrations. The IMAP integration can be configured from the Home Assistant GUI and the IMAP Email Content integration needs manually adding to your configuration.yaml file.
In the following example, I am going to show how you can configure IMAP in Home Assistant and then use the sensor in an automation to send a notification to my phone to remind me to check my emails if the unread count of my inbox is higher than 25.
Configure IMAP in Home Assistant
Navigate to "Settings" -> "Devices & Services" then click "+ Add Integration".
Type IMAP in the search box and click on IMAP from the search results.
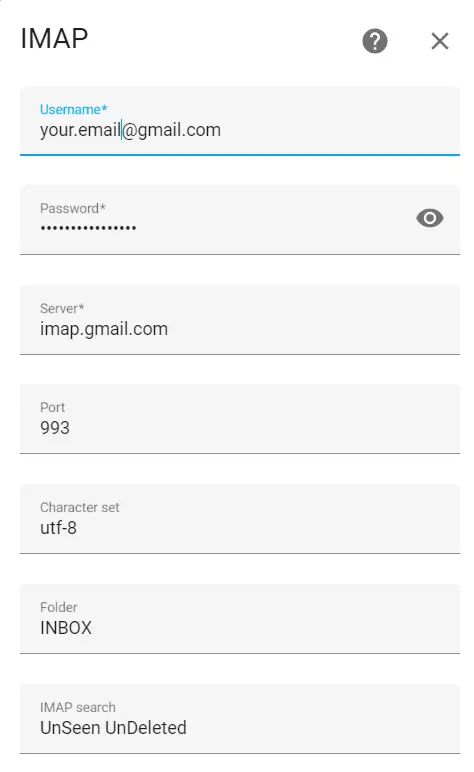
Fill in the required information, see the screenshot below for an example of how I configured a Gmail account.
Click the Submit button to save.
Create Your Home Assistant Email Trigger Automation
Navigate to "Settings" -> "Automations & Scenes" then click on "+ Create Automation".
Click on "Start with an empty automation".
Add your trigger: Click on the "+ Add Trigger" button and choose "Numeric state" from the list.
From the Entity list locate your imap.* entity you just created in the previous section and select it.
In the "Above mode" section ensure "Fixed number" is enabled then in the above box enter 25.
In the For box I enter 2 hours, this means the unread count must have been above 25 for a minimum of 2 hours in order to trigger the automation.
Optional: Create a condition. I use the condition that the automation only runs before sunset and after sunrise.
Add an action by clicking on the "+ Add Action" button.
To send a notification to your phone choose "Call Service" and then search for your phone notification service by searching with "notify." at the beginning.
Enter your custom notification title and message in the appropriate boxes then click save.
Here is the full code to my example automation outlined in the steps above.
alias: Notify when Email unread above 25
description: "Send a notification when my inbox reaches 25 unread emails"
trigger:
  - platform: numeric_state
    entity_id: sensor.imap_your_email_gmail_com
    for:
      hours: 2
      minutes: 0
      seconds: 0
    above: 25
condition:
  - condition: sun
    before: sunset
    after: sunrise
action:
  - service: notify.mobile_app_pixel_6
    data:
      title: Check your emails
      message: You have more than 25 unread emails, time to clean up your mailbox.
mode: single
Home Assistant Email Sensor
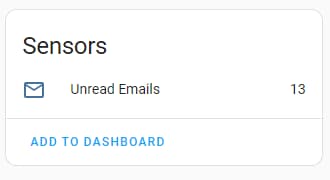
A Home Assistant email sensor is created when you add the IMAP integration and can be used to display your unread email count on the dashboard.
Home Assistant IMAP Email Content
The Home Assistant IMAP Email Content integration can be used to read emails from your IMAP email server and report as a state change. Examples of what this integration can do are searching for specific keywords in an email or extracting formatted text to create your own template sensor.
Full examples of how to use the Home Assistant IMAP Email Content integration can be found on the official documentation page here.
Integrating Home Assistant email with other platforms
Home Assistant can be integrated with a variety of other platforms to send emails. Here are some examples:
IFTTT: IFTTT (If This Then That) is a web-based service that allows users to create custom integrations between different platforms. To use IFTTT to send emails from Home Assistant, you can create an applet that triggers an email action when a certain event occurs in Home Assistant. For example, you can create an applet that sends an email when a motion sensor is triggered.
Node-RED: Node-RED is a visual programming tool for creating event-driven applications. It can be used to create custom integrations between Home Assistant and other platforms, including email services. For example, you can create a Node-RED flow that sends an email when a certain event occurs in Home Assistant.
Zapier: Zapier is a web-based service that allows users to create custom integrations between different platforms. To use Zapier to send emails from Home Assistant, you can create a zap that triggers an email action when a certain event occurs in Home Assistant. For example, you can create a zap that sends an email when a temperature sensor exceeds a certain threshold.
Frequently Asked Questions
What is an SMTP server?
An SMTP server is a server that is responsible for sending email messages. It stands for Simple Mail Transfer Protocol and is used to send email over the internet.
How do I find my SMTP server details?
You can usually find your SMTP server details in the documentation or help section of your email provider's website. Alternatively, you can contact your email provider's support team for assistance.
Why am I not receiving email notifications from Home Assistant?
There are several reasons why you may not be receiving email notifications from Home Assistant. It could be due to a misconfiguration of the SMTP server, a problem with your email provider, or an issue with the Home Assistant logs. Refer to the troubleshooting section of this guide for help resolving the issue.
What is an IMAP server?
IMAP stands for Internet Message Access Protocol. An IMAP server is a type of email server that allows users to access their email messages from multiple devices and locations. Unlike POP3 (Post Office Protocol version 3), which downloads email messages to a single device and deletes them from the server, IMAP stores email messages on the server and allows users to view and manage them from multiple devices.
Conclusion
Sending emails from Home Assistant is a valuable feature that can help you stay informed of events happening in your home. With the steps outlined in this guide, you can easily configure and customize email notifications to suit your needs. If you encounter any issues, refer to the troubleshooting section or contact the Home Assistant community for assistance. Happy automating!