


Introduction
Home automation is becoming increasingly popular, with more and more devices able to be controlled and automated.
Two of the most popular home automation platforms are Home Assistant and Alexa.
But how do they work together?
Integrating Alexa voice control with Home Assistant can provide some great benefits. In this article, I will guide you through step-by-step the Home Assistant Alexa manual configuration, which is the free method that doesn't require a subscription to Home Assistant Cloud.
What is Home Assistant?
Home Assistant is an open-source home automation platform that allows you to control and automate a wide range of smart home devices.
It provides a centralized hub to connect devices from many different manufacturers using technologies like Zigbee, Z-Wave, WiFi, Bluetooth and more.
Home Assistant gives you a single interface to control and customize your home automation system.
What is Alexa?
Alexa is Amazon's cloud-based voice service that powers devices like the Amazon Echo.
Alexa allows you to use your voice to control smart home devices, access information, play music, set alarms and more.
Alexa is built into Amazon's Echo line of smart speakers, but the service can also be accessed through apps and other devices.
Why Integrate Home Assistant and Alexa?
Integrating Home Assistant with Alexa provides hands-free voice control for your home automation devices and access to Alexa's growing list of capabilities.
You can use Alexa to turn lights on and off, lock doors, change thermostat settings and more by integrating it with Home Assistant.
It also allows you to leverage Alexa capabilities like weather reports, music streaming and voice control in your automations.
Setting up Alexa Integration
Integrating Alexa with Home Assistant for free is a relatively difficult process that involves installing the Home Assistant Alexa skill, linking accounts and configuring devices.
Note
An easy method of integrating Home Assistant with Alexa is available for Home Assistant Cloud subscribers which costs around $7 per month.
Home Assistant Alexa Prerequisites
Your Home Assistant instance is installed with remote access using HTTPS on port 443
An AWS Account along with an Amazon Developer Account.
Let's go through each step.
Section 1 - Create an IAM Lambda Role
Sign in to the Amazon AWS Console here. If you don't have an AWS account click Create a new AWS account which is entirely free.
Create your IAM Role for Lambda by going to Services then Security, Identity & Compliance and click IAM to get to the IAM Dashboard.
Click Roles then click on Create Role.
Choose AWS Service as the entity type and Lambda for the use case then click next.
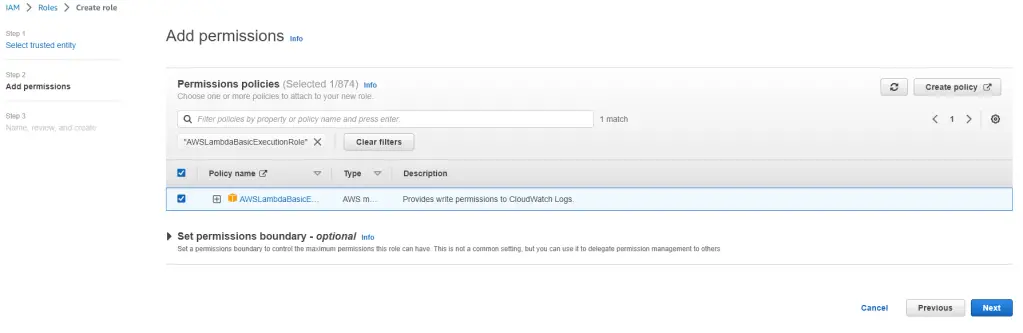
On the Add permissions step select the policy name AWSLambdaBasicExecutionRole and then click next.
Give your role a name, for mine I used AWSLambdaBasicExecutionRole-HomeAssistant then click create role at the bottom of the page.


Section 2 - Lambda Function
Create a Lambda Function
Click Services then select Compute and finally select Lambda.
Click on Create function from the Lambda Dashboard.
Choose Author from scratch then provide a function name, I used myHomeAssistantFunction for my own setup.
In the Runtime section choose Python 3.11.
Expand the Change default execution role section then select Use an existing role and then select your Lambda role which was created in section 1 of this guide.
Click the Create function button.

Once your function has been created it will have been assigned an endpoint address (known as the Function ARN). It will look something like this: arn:aws:lambda:eu-west-1:123456789101:function:myHomeAssistantFunction
Copy the ARN address somewhere as you will need this in the next section when creating your custom Alexa Skill.
Section 3 - Creating your Amazon Alexa Smart Home Skill
Create your Skill
Sign in to the Amazon Developer Console using the same account your Alexa devices are linked to.
Go to the Alexa Skills page by clicking Skills from the Alexa menu at the top of the page.
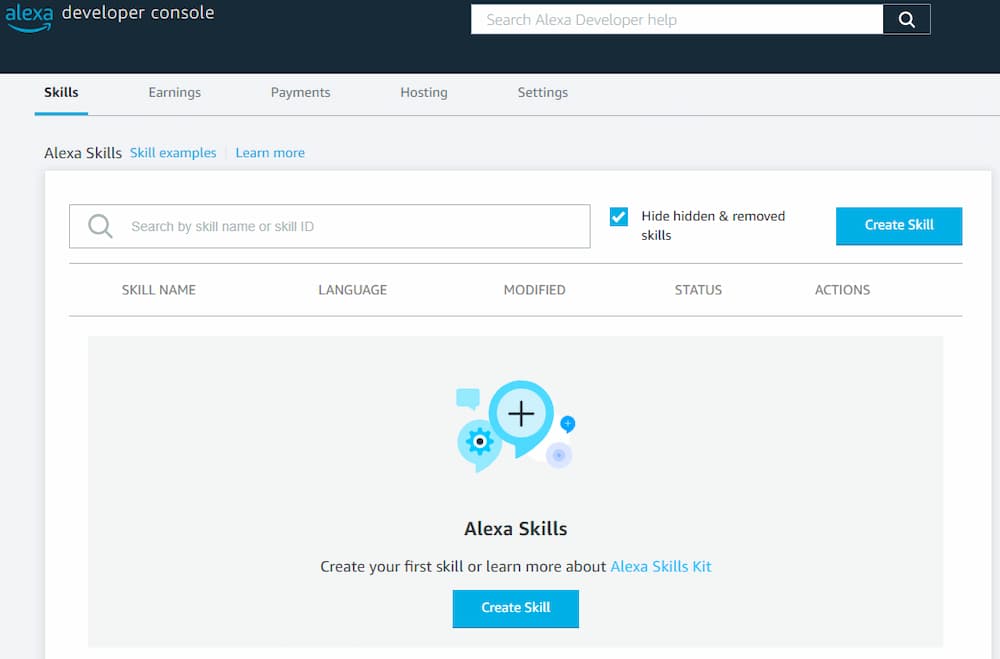
Click the Create Skill button.
On the first page give your skill a name, I named mine Home Assistant. Then select your primary locale and click next.
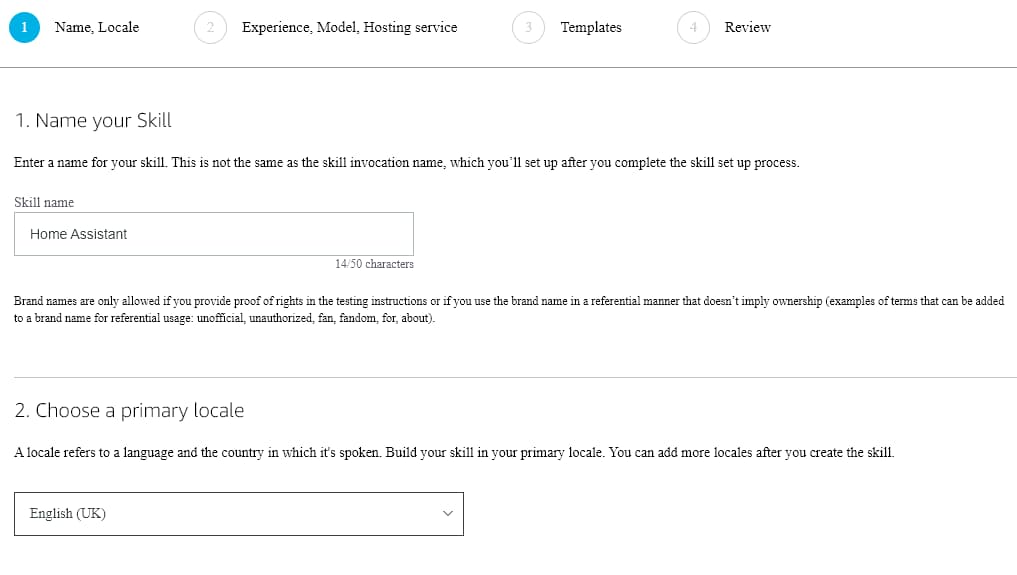
For step 1 (Choose a type of experience) select the Smart Home checkbox.
For step 2 (Choose a model) select Smart Home.
For step 3 (Hosting services) select Provision your own then click next at the top.

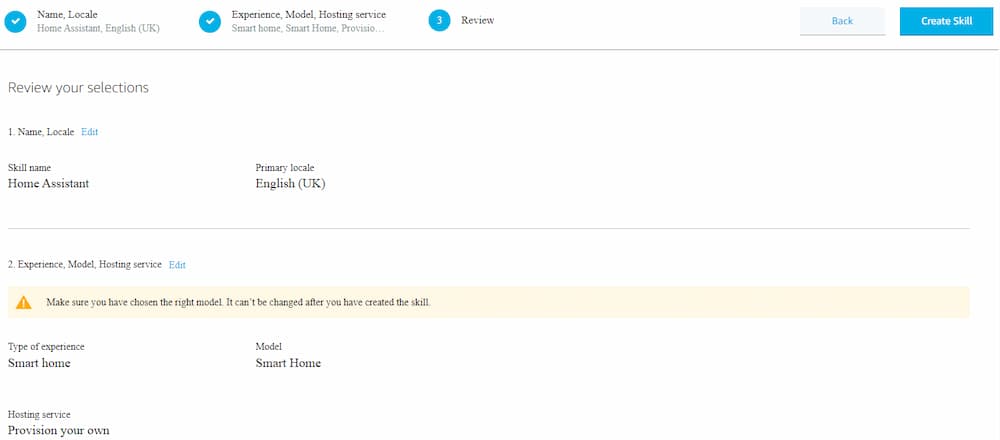
Review your settings and then click Create Skill.
Your settings should look similar to below with the exception of your own language choice.
On the final page ensure the payload version is set to v3 then paste your Lambda endpoint address (ARN created in section 2) into the box labeled default endpoint we created earlier in section 2 then click Save.
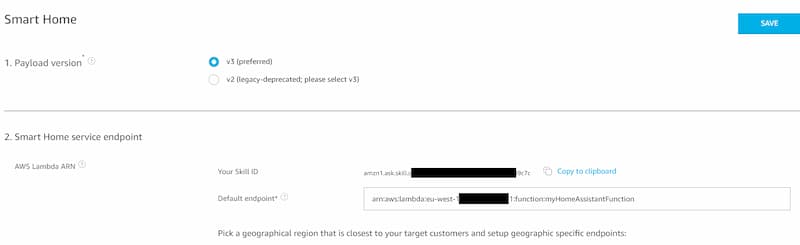
Note
Make a note of your Skill ID as you will need it for the next section where you will be configuring your Lambda function.
Section 4 - Configure the Lambda Function
Head back to your AWS console then select Services -> Lambda -> Functions and then click on your Lambda function.
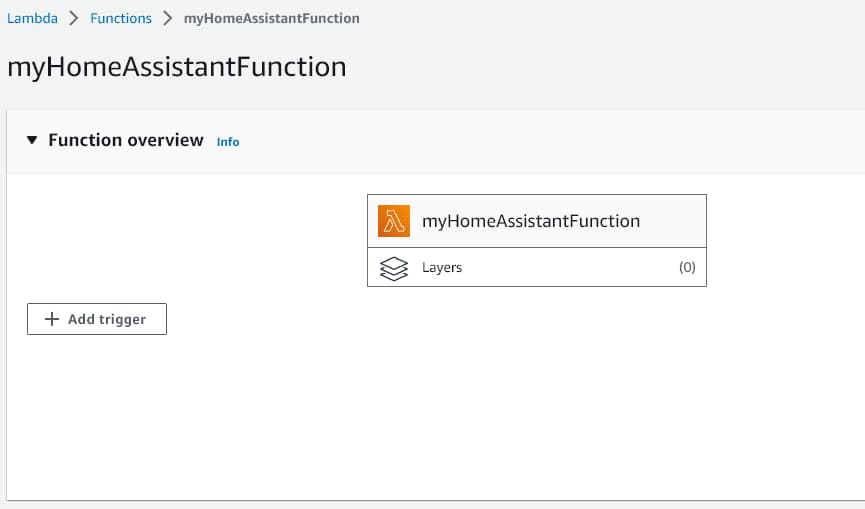
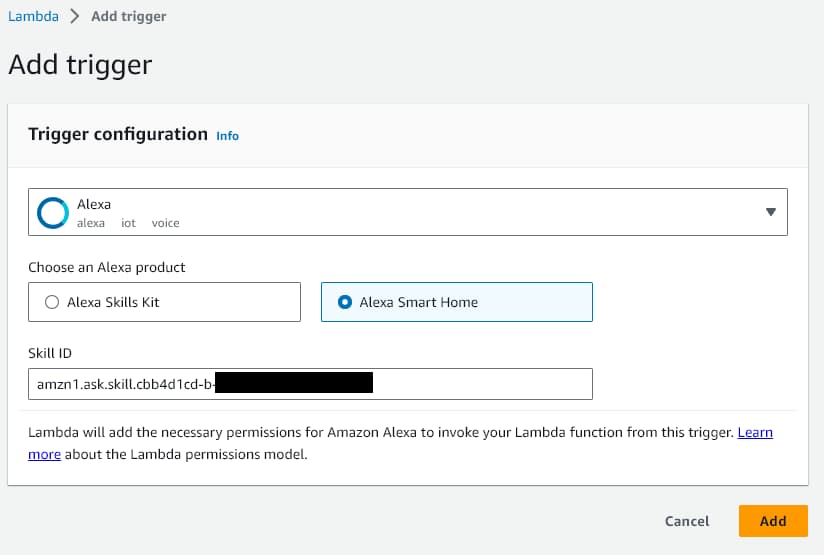
Inside your new function expand the function overview section and click on Add Trigger then select Alexa Smart Home from the dropdown. You will be asked to enter a Skill ID, this is the Skill ID from the Alexa Skill you created in section 3 that you made a note of.
Now scroll down to the Code source screen and open the lambda_function.py file.
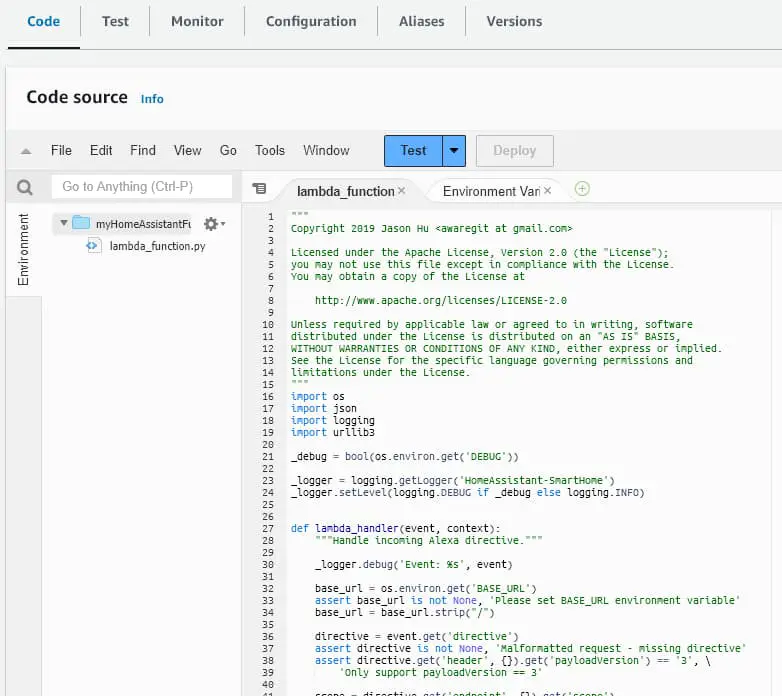
Go to https://gist.github.com/matt2005/744b5ef548cc13d88d0569eea65f5e5b and copy the code, then paste it in to the lambda_function.py file (overwriting the exist content) and click Deploy.
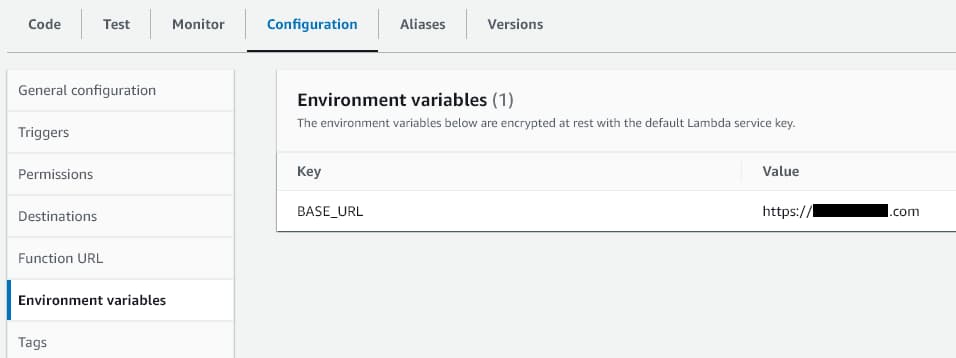
Now go to the configuration tab and select Environment Variables.
Add a new variable called BASE_URL and enter your Home Assistant remote access URL. Example https://yourname.duckdns.org then click save.
Section 5 - Link your Skill to your Amazon account
Your Alexa skill will need to be linked to your Amazon account to ensure that only authenticated requests can interact with your devices.
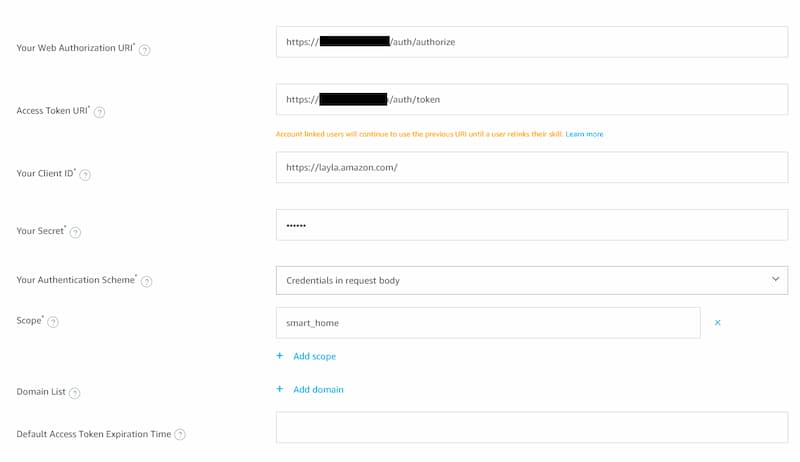
Click on Account Linking from the left menu inside your Alexa skill then complete the form as described below.
| Your Web Authorization URI | https://your-home-assistant.url/auth/authorize |
| Access Token URI | https://your-home-assistant.url/auth/token |
| Your Client ID | https://pitangui.amazon.com/ - for US residents https://layla.amazon.com/ - for EU residents |
| Your Secret | input anything in this field, it isn't used just yet. I set mine to 123456 |
| Your Authentication Scheme | Credentials in request body |
| Scope | smart_home |
Once completed click Save and it should look something like this:
Link your Alexa skill to Home Assistant
Now you will need to open the Alexa app from your mobile device and link the skill from there.
Open the app and go to More -> Skills and Games then scroll right to the bottom and click on Your Skills.
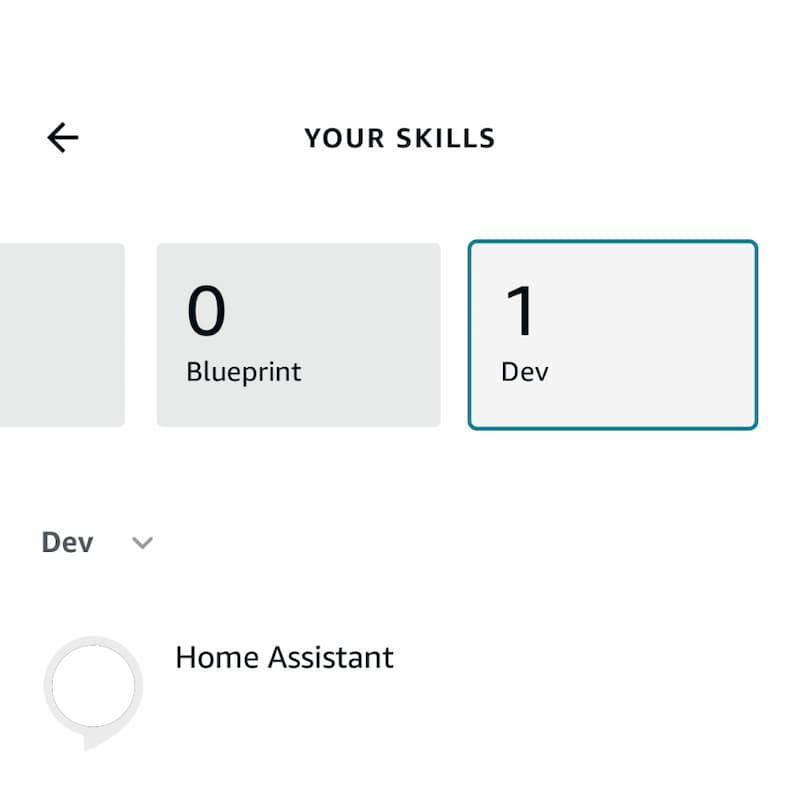
Click on the Dev box and then click on your Home Assistant skill and click on Enable to use. A window will open up and you will need to login to your Home Assistant instance to create the link.
Once linked you are all set up and Alexa will now automatically start discovering your devices and these devices will show up in the Alexa app. If no devices show up straight away or at a later date you add new devices you can simply ask Alexa to discover your devices.
Using Alexa with Home Assistant
Once fully configured, Alexa can be used to control smart home devices, access information about your home and run automations.
Configuring Devices and Entities
Once linked, you can configure which Home Assistant devices, entities and scenes you want Alexa to have access to. Go to the Devices section in the Alexa app to enable the ones you want to control. Give them easy-to-remember names.
Controlling Devices
You can control your lights, locks, switches and other connected devices by voice. For example, "Alexa, turn on the kitchen lights" or "Alexa, unlock the front door". Use the friendly names you configured.
Accessing Information
Request information about sensors around your home. For example, "Alexa, what's the temperature on the patio?" or "Alexa, is the garage door open?". This provides hands-free access to your home data.
Automations and Routines
Alexa integrations allow the use of voice commands to trigger Home Assistant automations. You can create Alexa routines that activate scenes in Home Assistant to control multiple devices.
Tips for Using Alexa with Home Assistant
Here are some tips to get the most out of using Alexa with Home Assistant:
Make Sure Devices are Discovered
Ensure all your devices show up correctly in Home Assistant so Alexa can access and control them. Check integrations and discovery is working.
Use Friendly Names
Give your devices and entities easy-to-remember and friendly names. This allows you to control them more naturally with voice commands.
Create Groups
Group devices like lights together so you can control multiple with one command by naming the group intuitively.
Use Alexa Guard
Leverage Alexa Guard features like Away Mode by integrating with Home Assistant automations to enhance security monitoring.
Alexa Limitations and Troubleshooting
While the integration works well, there are some limitations and you may encounter issues getting set up.
Limited Functionality
Alexa doesn't have full access to all Home Assistant functions. Some device types may have limited compatibility. Complex automations may not translate fully.
Troubleshooting Common Issues
Make sure to enable the Home Assistant skill. Check account linking and URLs. Ensure devices are discovered properly and entities are exposed. Update integration and reboot if needed.
Conclusion
The Home Assistant Alexa integration for added voice control is straightforward with the right setup. It provides convenient hands-free control of smart home devices and access to information.
I have used both Google Assistant and Alexa with Home Assistant and found Alexa to respond slightly quicker to voice commands when requesting things such as lights to be turned on or off.
Google will respond to commands with longer responses like "OK, turning off living room light" while Alexa simply responds with "OK" which I find much better.
While some limitations exist, it's a useful addition for most homeowners who use Home Assistant for automation. As both platforms continue advancing, the integration will likely improve over time leading to an even more seamless experience.
Future Possibilities
As Amazon and Home Assistant add more capabilities, we can expect deeper integrations between the platforms. Potential advances include more intuitive automation triggering, user awareness features and expanded device support.
The future is bright for those looking to unify their home automation system under an Alexa-integrated Home Assistant.